FileZilla
- Request FileZilla to be available within OneView.
-
Once you open FileZilla, on top left corner under File option, select
Site Manager. This allows you to add hosts so that you can quickly connect to them.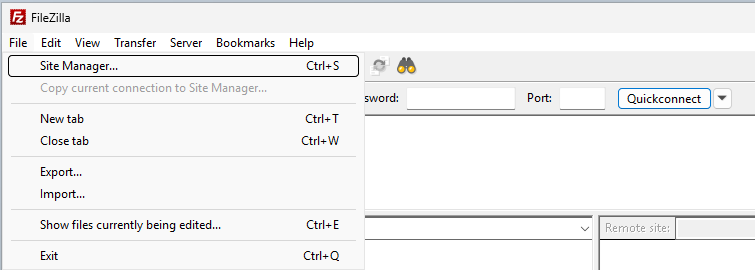
-
Click on
New siteon the bottom. Edit the name and change it something identifiable (eg.helios).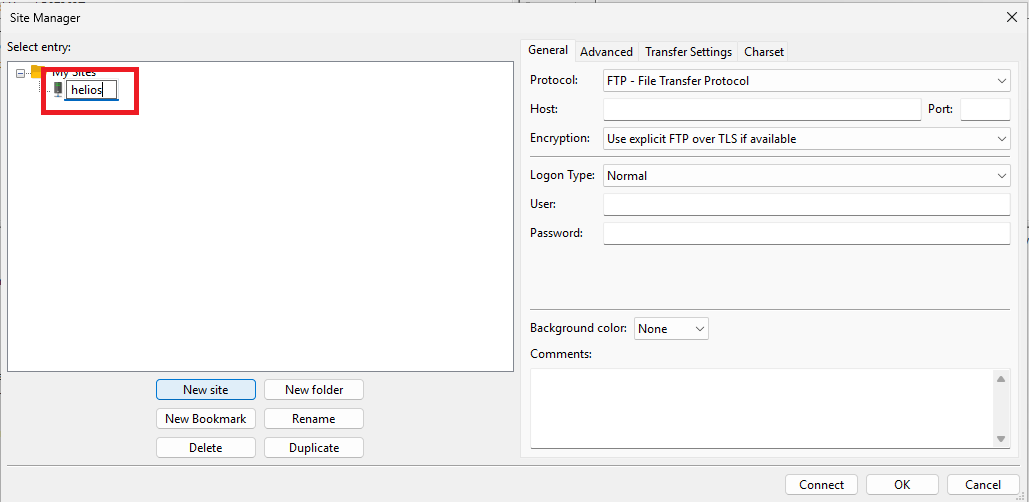
-
On the right side of the screen, under
Generaltab set the Protocol toSFTP. This allows for transferring files over SSH using the FTP protocol, thus making it more secure. - Set the
Hostvalue to the complete hostname for one of the login nodes (eg.helios.umcinfra.nl) - Value for
Portcan be left empty as it uses default value SSH port value of22. - Set
Logon TypeasInteractivefrom the drop down menu in order to get prompts for your password. -
Under
User, enter your[P-number]that you will log in as.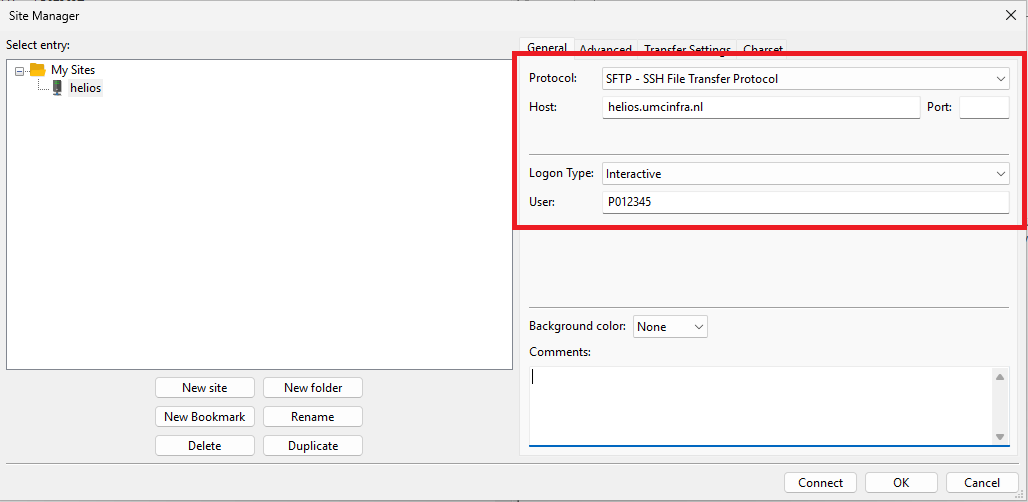
-
Under
Transfer Settingstab, selectLimit number of connectionsand set theMax number of connectionsvalue to1. This allows FileZilla to reuse the connection so you don't have to input your password for each file being transferred. Please note that enabling this will prevent you from browsing remote directory while file transfer is ongoing.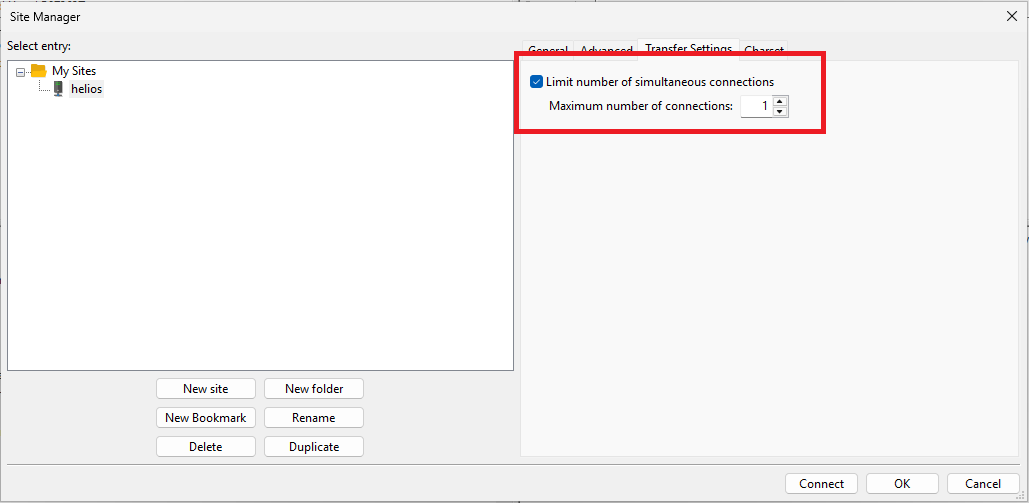
-
Click on
Connectat the bottom of the popup in order to test out the connection. -
For the
Unknown host keypopup, select the checkbox that saysAlways trust this host, add this key to the cache.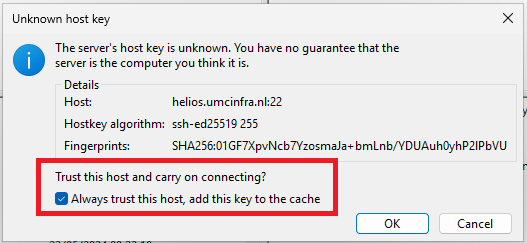
-
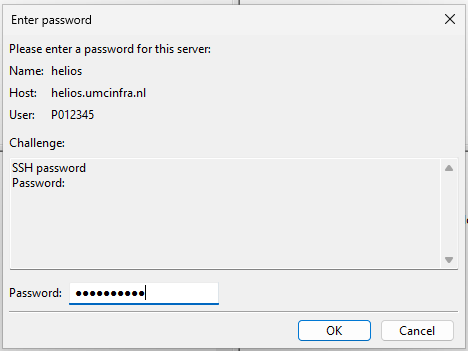
It should now prompt you to input your account password.
-
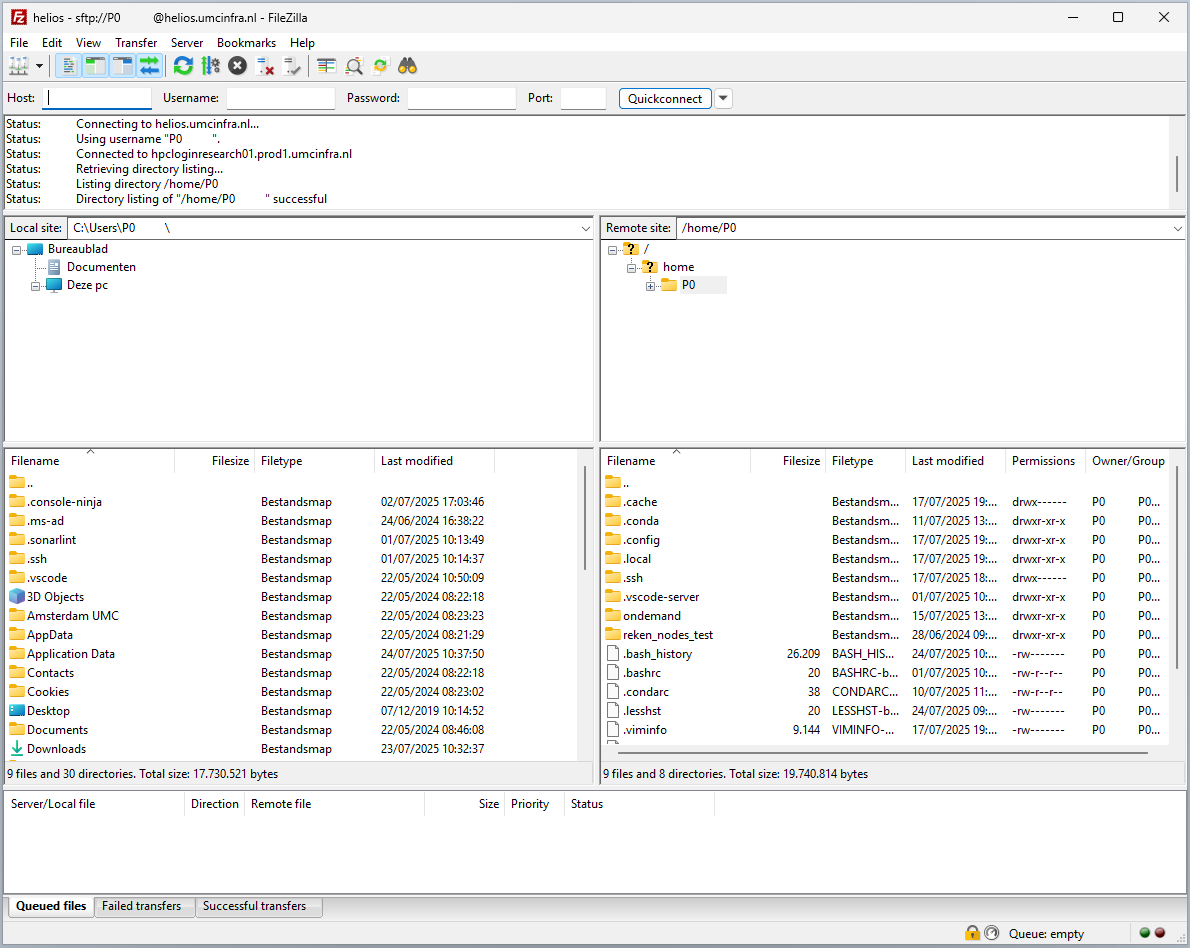
After a successful connection, the files on your local machine are shown on the left while files on the remote machine are listed on the right. You can double click a file in order to download/send it, depending on if the file exists on local or remote. Double clicking on a remote file will download the file to currently visible local folder and vice verse.
